In this tutorial, we'll cover the basics of using Maya's blendshapes to drive facial animation. First, we need a face. The techniques and best practices used to model character geometry won't be covered in this lesson. We'll just use an ordinary polygonal plane as our target shape - the principles covered here will be generic enough to use on any face.
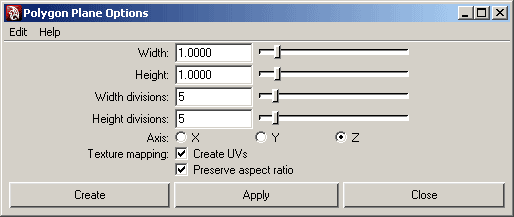
From the main menu, select the option box under Create > Polygon primitives> Plane
Make sure your settings look like this before creating the plane:
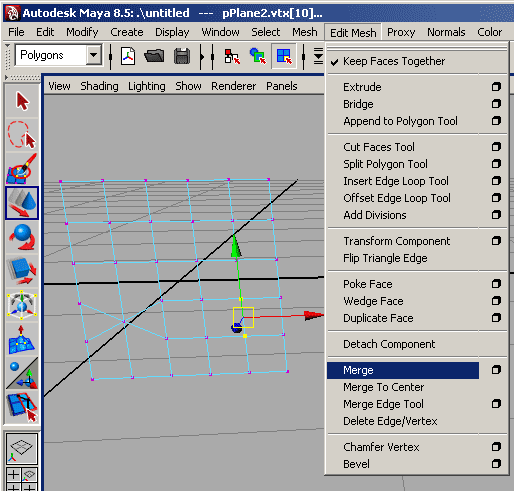
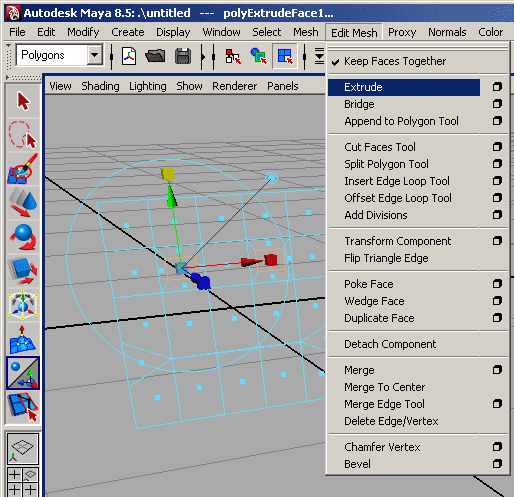
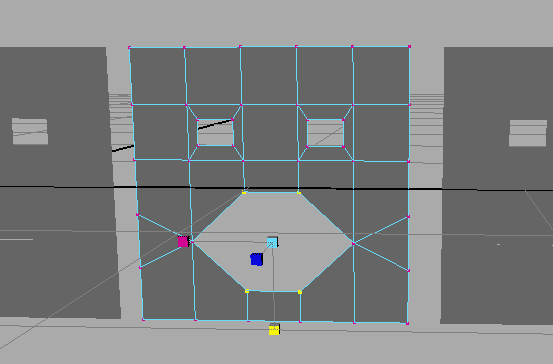
Now we need to form a mouth from the middle faces near the bottom of the mesh. We'll start by merging the vertices at the corners of our mouth. The menu option for this is under Edit Mesh. To enable the selection of vertices, hit F9. If you don't see the Edit Mesh menu, make sure the combo box on the left side of Maya is set to Polygons as in the picture.
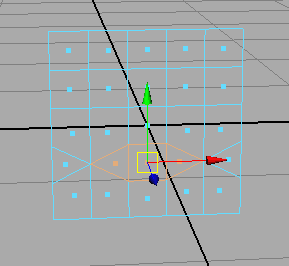
Now you should have a four-sided face with a three-sided face on either side. This will be our mouth. Select these faces (F11 is for face selection) and hit "delete". Now that we have a space for the mouth, we need to close it. Go back to the vert selection, F9, and scale the middle vertices together. The scale tool shortcut is "r". Make sure you only scale vertically (the green cube).
To make some simple eyes, let's extrude some faces where we want them to be. Select the faces near the top of the mesh for our eye sockets and use the Extrude option under the Edit Mesh menu. With the extrude tool, scale both the horizontal and vertical edges of the resulting face. To do this, just click and drag the green and red cubes that show up when the tool launches. Now delete the resulting faces to leave two holes in our poly plane.
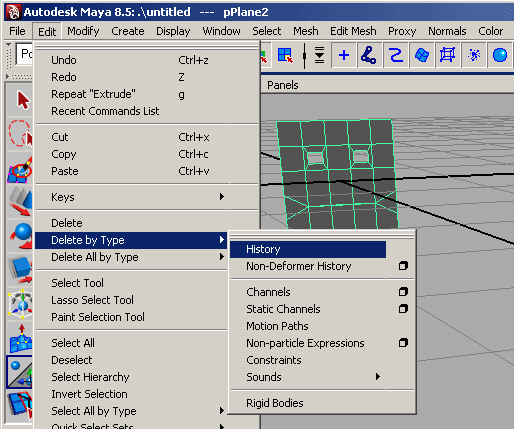
Now that our geometry resembles a face, we can delete history and start making our blendshapes. Hit F8 to return to the normal selection mode and use the Delete by Type menu to clean up our scene. Deleting this history is important at this stage, because skipping this step will slow down Maya later and deleting it after we do much more will become troublesome.
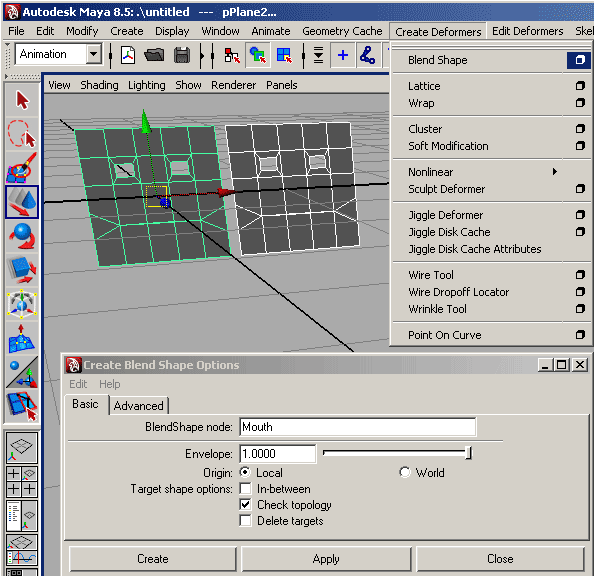
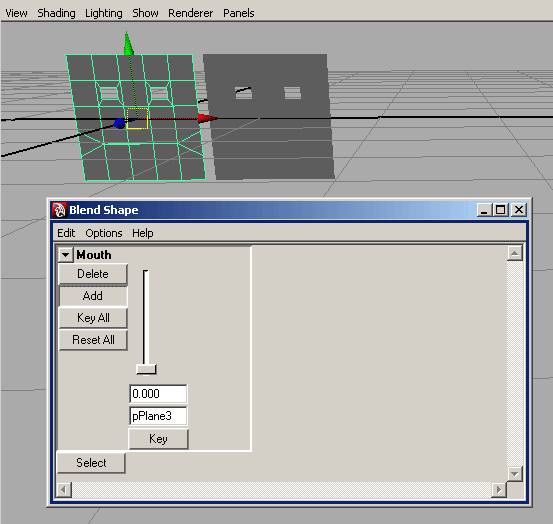
With our face selected, hit Ctrl+d to duplicate our mesh. The new face should be right on top of our original one. Just hit "w" to enable the move tool and slide the new face over. While the new face is selected, shift select the original face. The selection order is very important. Make sure that the duplicate face highlights white, and the original is green. Now open the Blend Shape tool options under Create Deformers. This menu won't show up until you change the combo box from Polygons to Animation as in the picture. The settings should look like mine below. I've set the name to "Mouth" because that will be the only thing animated by blendshapes in this rig. If you have more than the mouth in mind for your own rig, feel free to name this node whatever works for you.
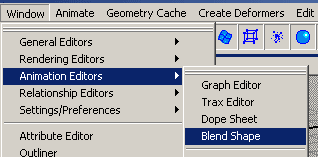
Blendshapes have special attributes that are best managed through the Blend Shape Editor. This tool can be found under Window > Animation Editors > Blend Shape.
Now that the Blend Shape Editor is open, we can easily add more shapes for our animation system. I want to keep this simple so we'll only add one more here. To do this, just select the original face and hit Add in the Blend Shape Editor. Maya will do the connections and duplications for you. Don't bother trying to do that yourself. While it is possible, it's more trouble than it's worth. After the new shape appears in the editor, there will be a new poly plane in your scene. Move the new face next to our other duplicate so we can start making modifications.
The first face we'll need is an open mouth. To make this one, select the vertices in the middle of the mouth and scale them vertically.
We'll also need a small mouth shape. This one can be made by scaling all the mouth vertices horizontally.

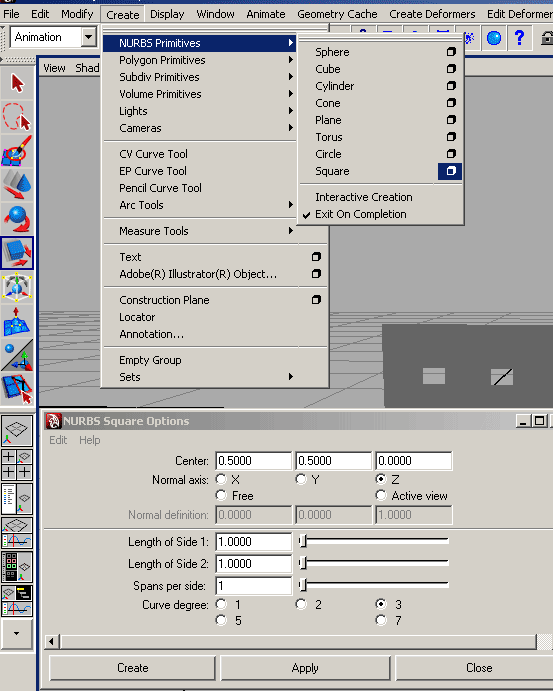
To make a more elegant controller, we'll need to add some non-renderable objects to our scene. I like to use nurbs and locators for this. Our controller will rest in a box created under the NURBS Primitives menu. Open the options menu after Square and make sure the settings look like mine below.
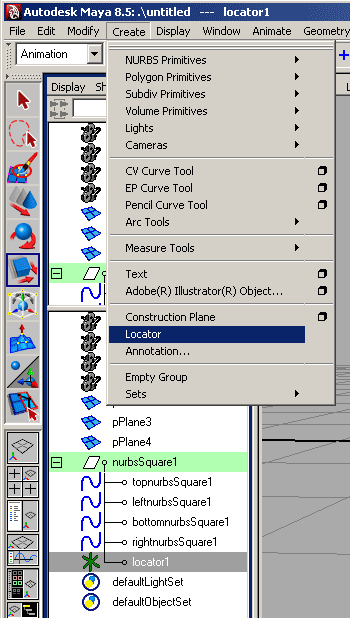
This will create a square made of four individual lines grouped together. Open the outliner to see how this hierarchy looks. Next add a locator to the group using the menu option Create > Locator. Parent the locator under the square group node by middle dragging in the outliner. Or, select the locator in the outliner, ctrl+select the group and hit "p".
Now that the locator is part of the group, you can select the group and move it over the face geometry so its convenient but out of the way.
This locator will be our controller for both of our blendshapes. To set this up, open the Connection Editor under Window > General Editors.
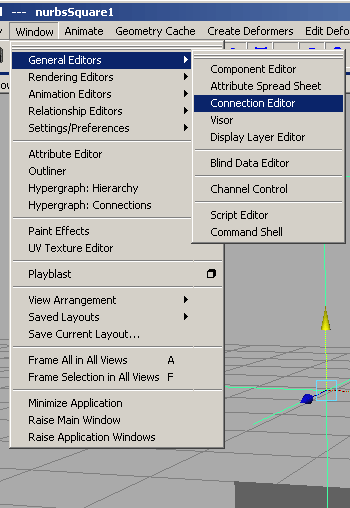
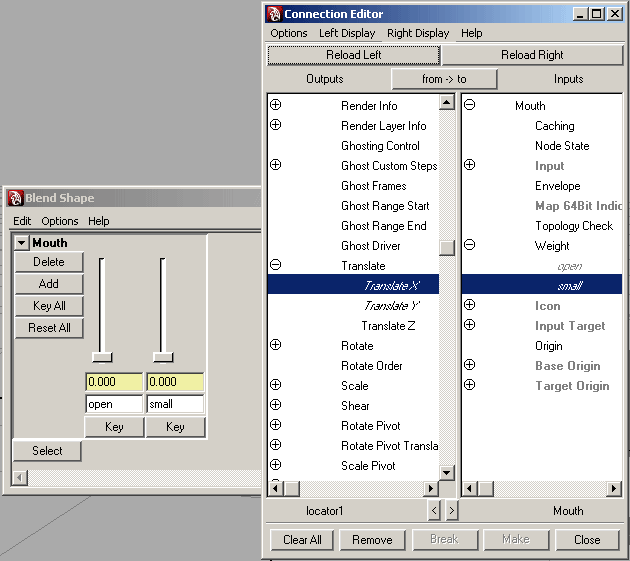
If you had the locator selected when you opened this editor, the left panel should already be populated with its attributes. If not, simply select it now and hit "Reload Left". Now go to the Blend Shape Editor and hit "Select" under the blendshape node. While it's selected, hit "Reload Right" in the Connection Editor. If you've been naming things the way I have, your editors should look something like this. The connections are made by clicking on attributes. We want to connect the translate x and y attributes of our locator to the blend shape "weights" of our mouth. To do this, click the Translate X attribute in the locator panel and click "small" (or whatever you've named yours) in the other panel. Repeat this for the Translate Y and the other blendshape weight and close the Connection Editor when you're done.
Now that our controller actually has control, you can use it to drive your facial animation. Just select it and move it around. The only thing left to do is to trap it inside the box we've made for it. I do this by setting translate limits on the locator itself. You'll find options for this in the attribute editor. With the locator selected, hit ctrl+a. Make sure the tab at the top isn't set to the shape. You should see attributes and options like those in the picture. Just set the minimum values of Translate x, y and z to 0 and the maximum x and y to 1. The maximum z should be set to 0 because we never want the locator to move at all in that direction.

From here, feel free to add more shapes and controllers as needed. Just make sure you add using the Add button in the Blend Shape Editor. Also note, the new shapes will start in the position the face is in when you click Add. For best results, make sure the locator is at 0,0,0 before adding new shapes. If you add shapes that make it seem like "mouth" is no longer a good name for your blendshapes, double click the name in the channel box or outliner and edit it.
DO:
If you use the Create Deformers menu to add more shapes, you'll end up with competing shapes. If your Blend Shape Editor ends up with a stack of shapes that all animate the same geometry, you won't get satisfactory results from your rig.
DON'T:

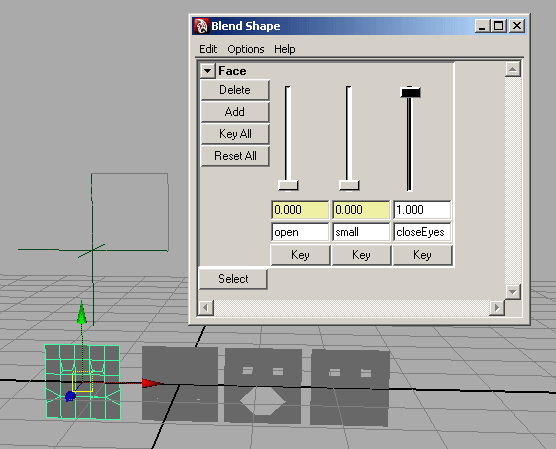
With a setup like this one, the "closeEyes" shape forces what should be an open mouth into a closed position. This is because the "Eyes" shape isn't part of the "Mouth" shape and the mouth is closed in the "Eyes" shape.